Using Variable Images
Variable images allow you to display different images depending on who's visiting the landing page.
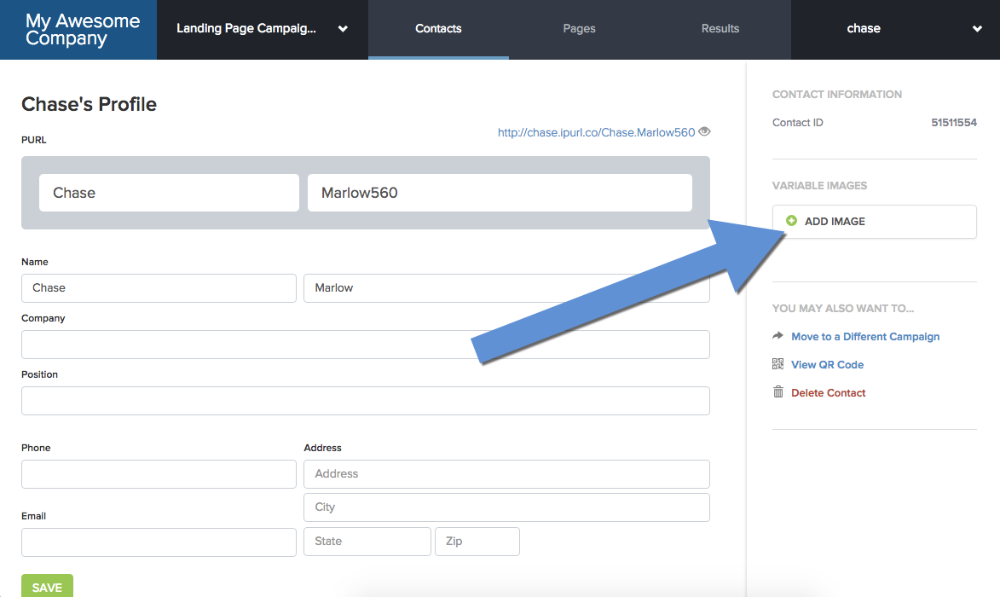
1. From with any contact's profile page, select "Add Image" in the "Variable Images" box.
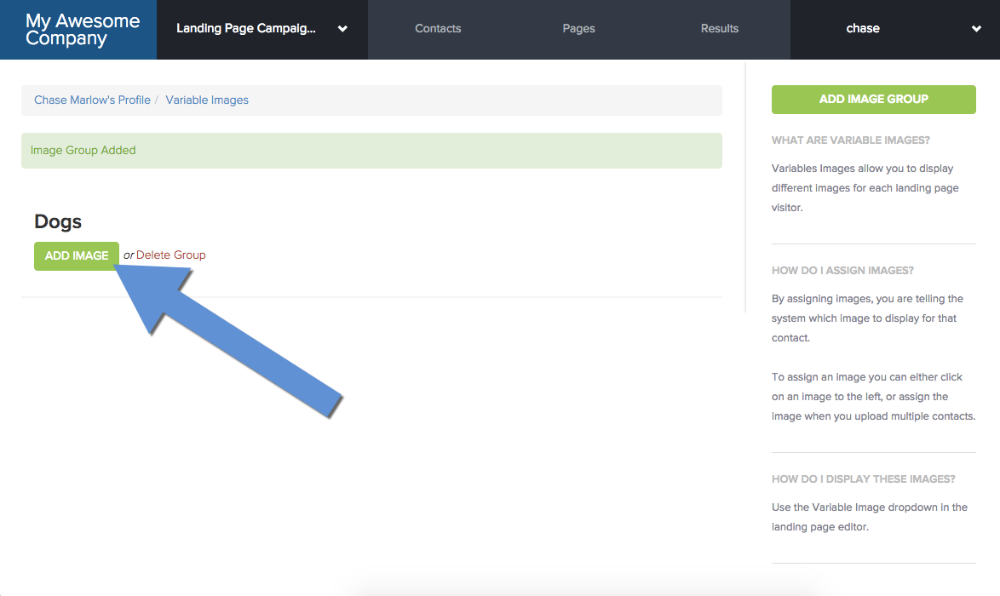
2. Select the "Add Image Group" button, and give the group a name.
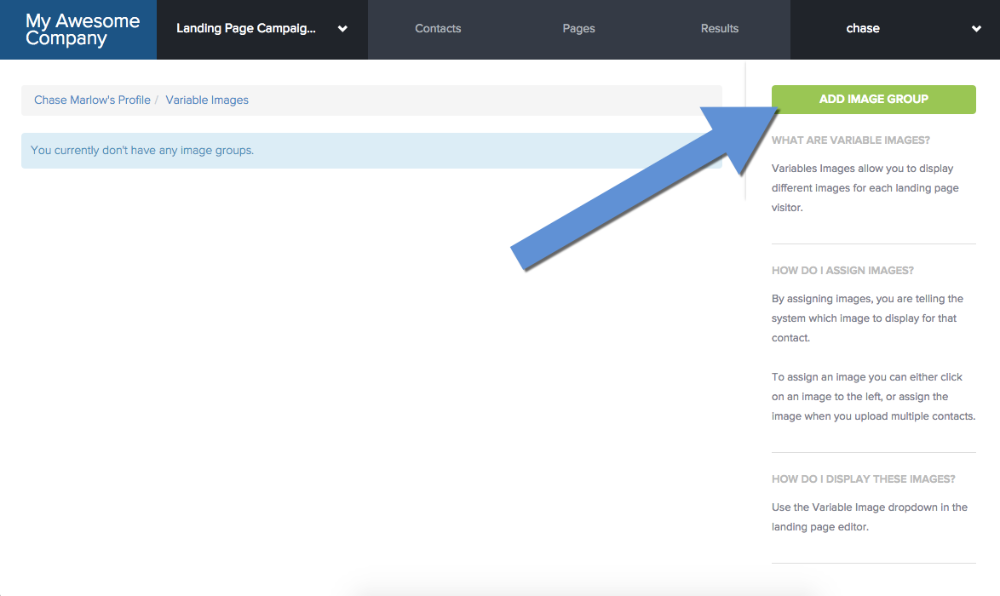
3. Name the image group.
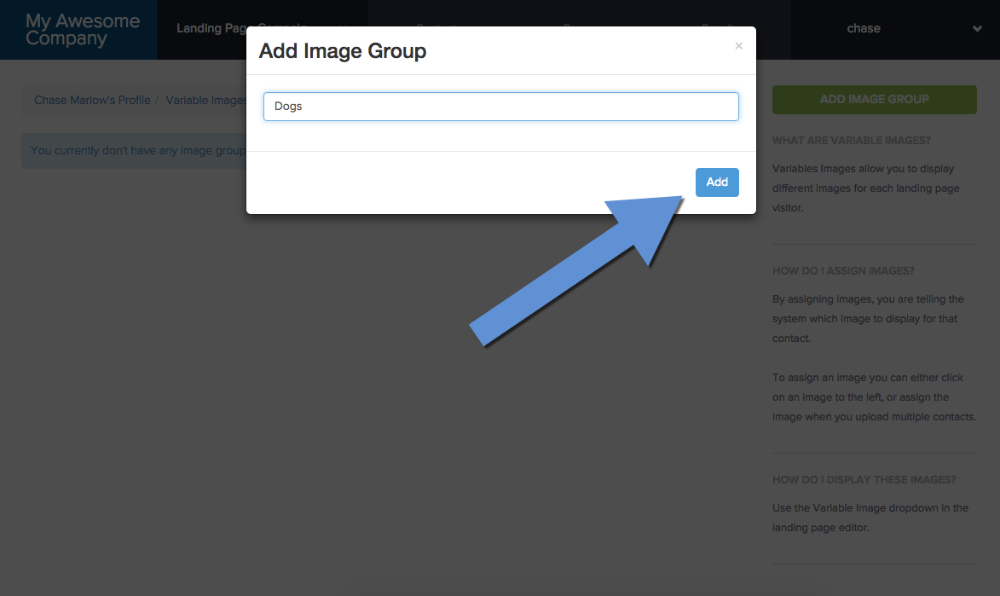
In our case, we are going to upload images of dogs, so we will name it... "Dogs."
4. Add Image(s) to the group.
Click Upload and browse to the image file on your computer. You can select multiple images for upload.
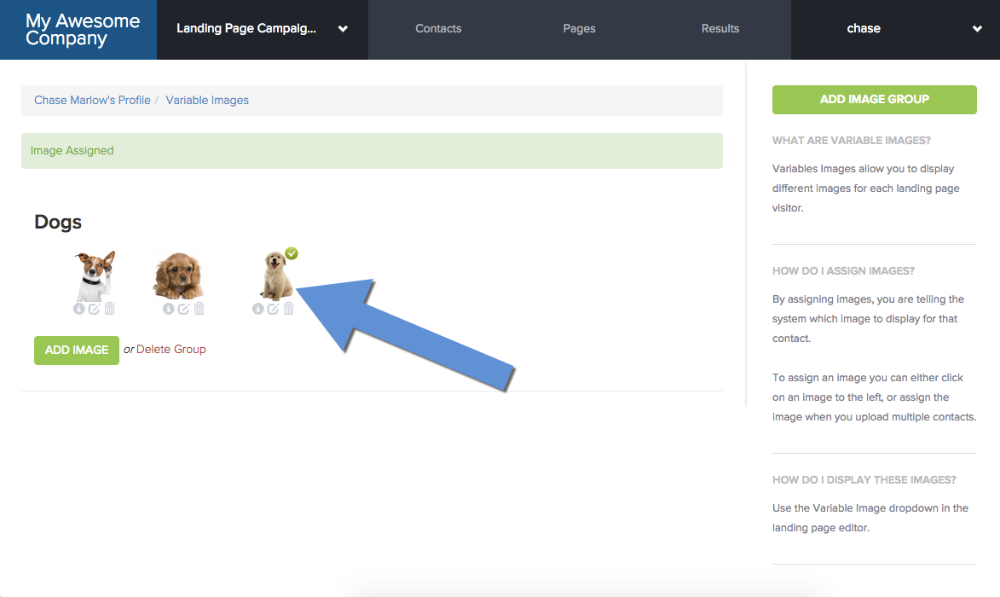
5. Click the image that you would like associated with this contact.
Continue adding images until all variable images are uploaded. In our case we have three images. Once you're done, select the image that you would like associated with this contact.
6. Return to the contact's profile page.
You can see that the selected image is now associated with this contact.
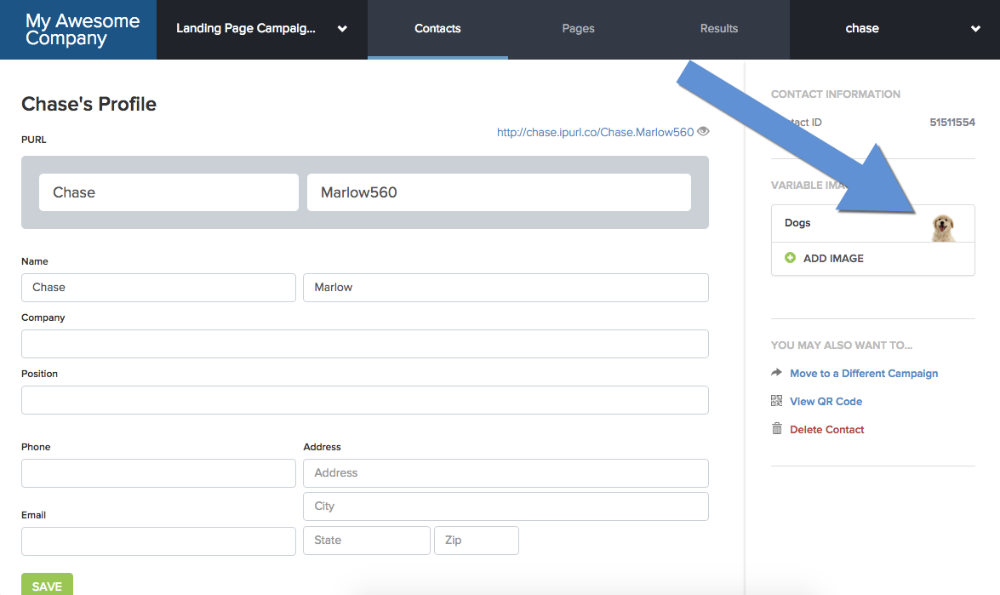
You can also assign variable images when you upload multiple contacts.
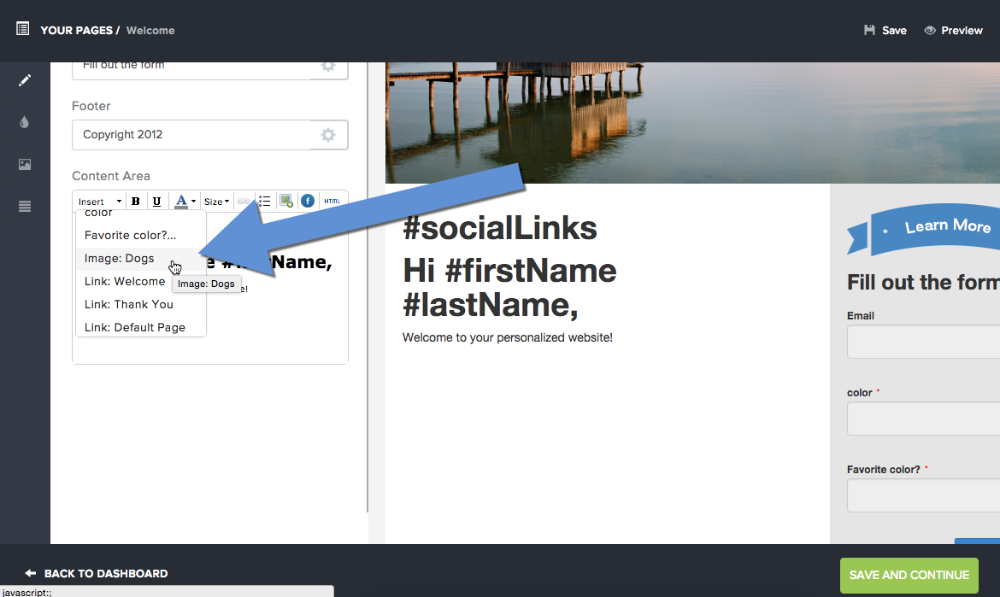
7. From the "Insert" dropdown, select the Image Group you just created.
You will see that the image code has been placed into the text area. This code will call in the appropriate image for each visitor.
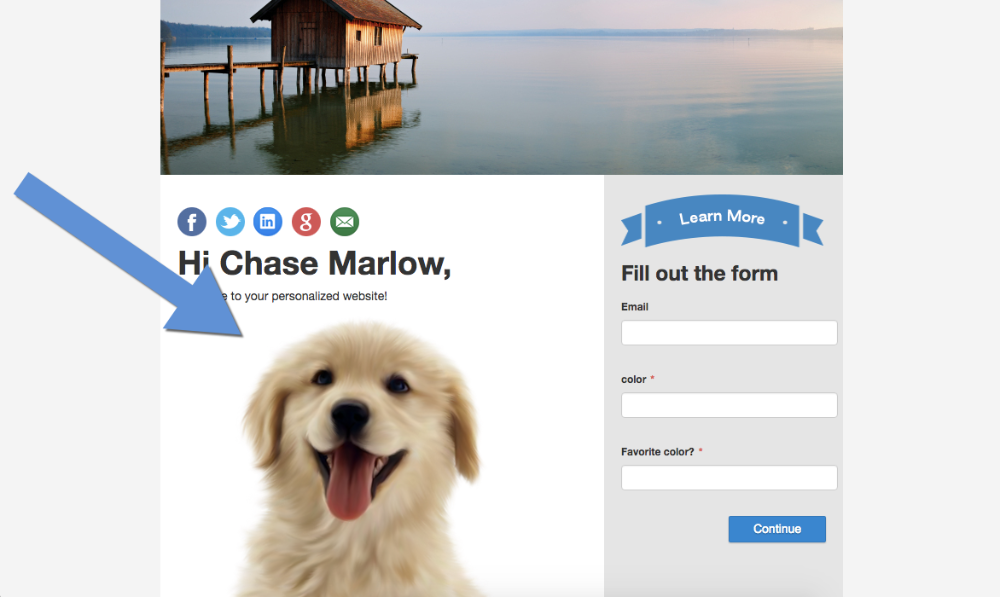
8. Now Save then Preview the Landing Page and see the Variable Image appear.
Remember, the landing page will only show the variable image if you associated one with the contact in Step 5.