Adding PURLs & QR Codes with Photoshop
sDid you know that it's possible to use Photoshop's Variables to add PURLs and QR Codes to your promotional pieces? Well you do now! Here is how...
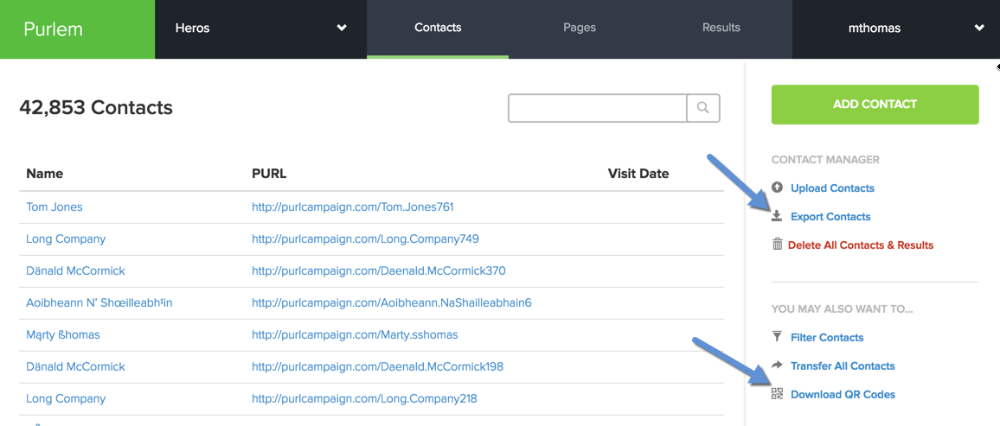
1. Export Contacts and QR Codes
Select Contacts > Export Contacts
Downloading PURLs will give you a spreadsheet file of all your contacts and their PURL
Select Contacts > Download QR Codes
Download QR Codes will provide you with a zip file containing the QR Code image for each contact.
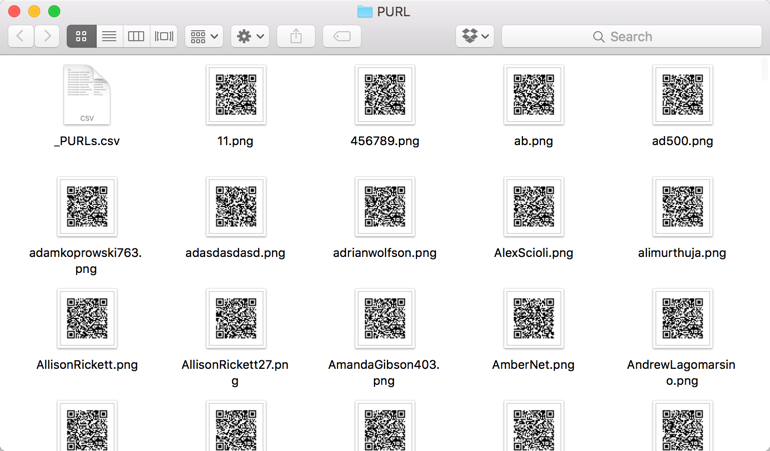
2. Add Spreadsheet and QR Codes into a New Folder
Create a new folder (Name it anything you want). Then drag the PURL Spreadsheet and all of the QR Codes and file into the folder.
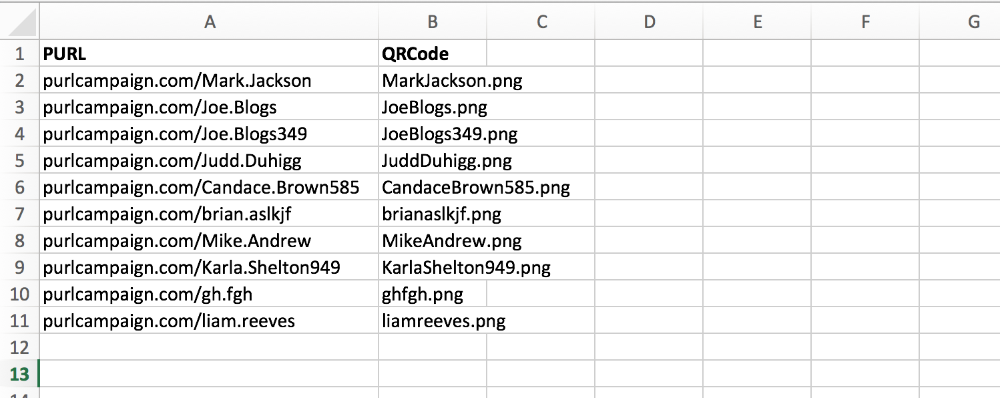
3. Remove Unnecessary Columns in PURL Spreadsheet
In my case, I will be using the PURL, QRCode columns..
Note that I removed the the spaces in both First Name and QR Code column . This is necessary for Photoshop.
All other columns should be removed.
Save the file.
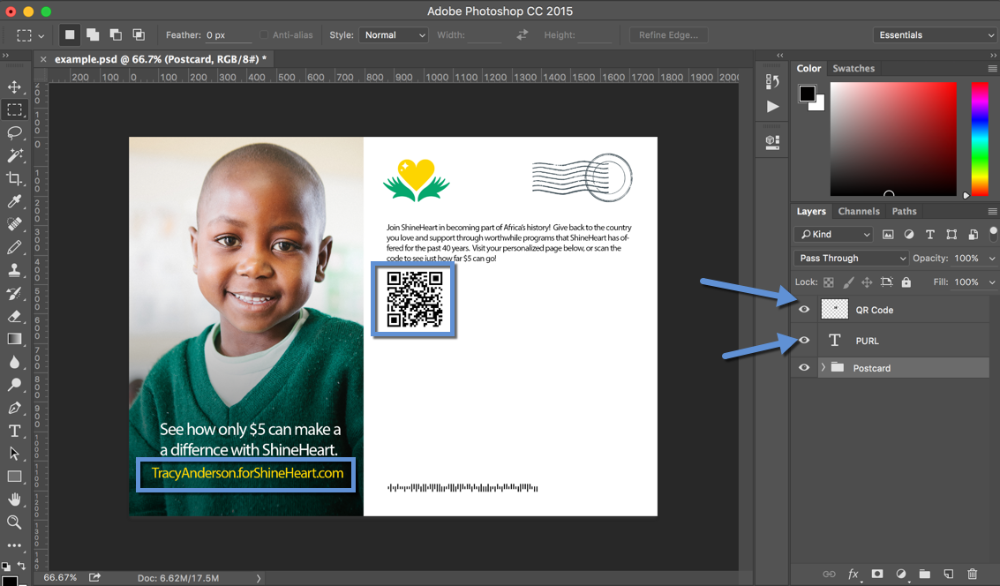
4. Add Layers to your Photoshop File for Each Column
Open your file in Photoshop. Create layers for each of the columns created in Step 3. In my case I will create a column for: QR Code, First Name, Letter and PURL.
Add default text and/or images to each layer.
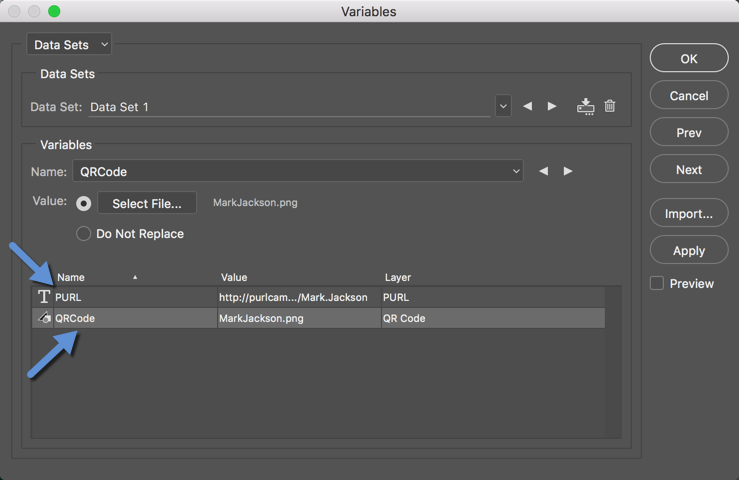
5. Open the Variables Window in Photoshop
Images > Variable > Define
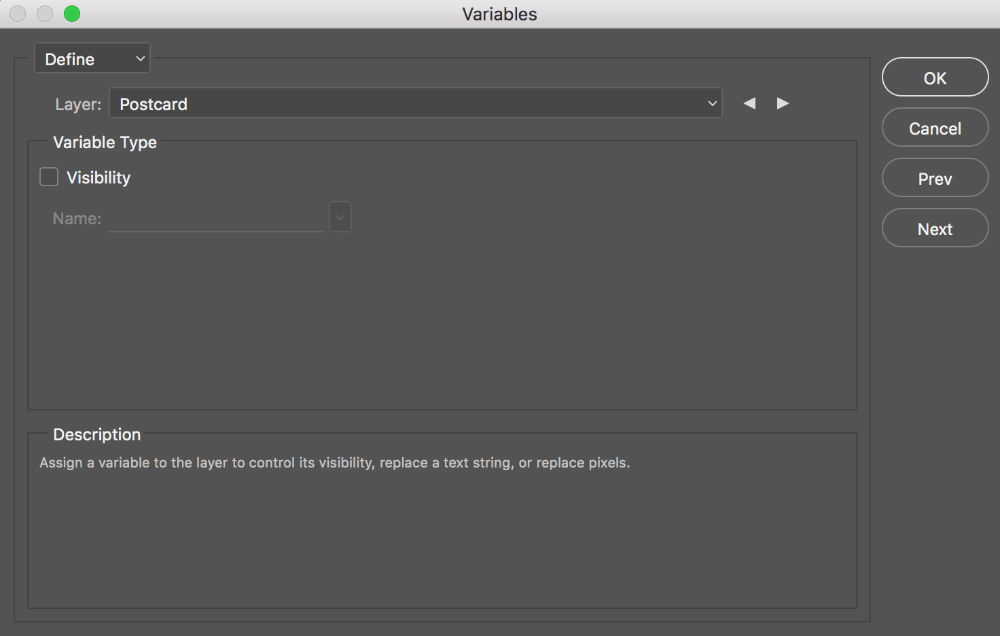
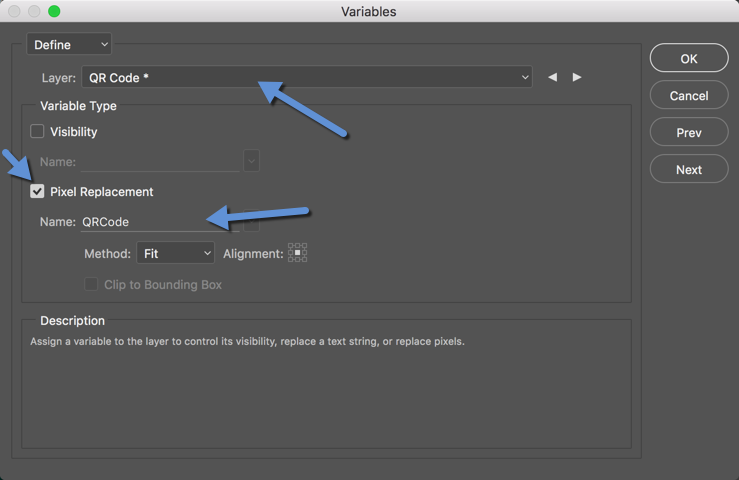
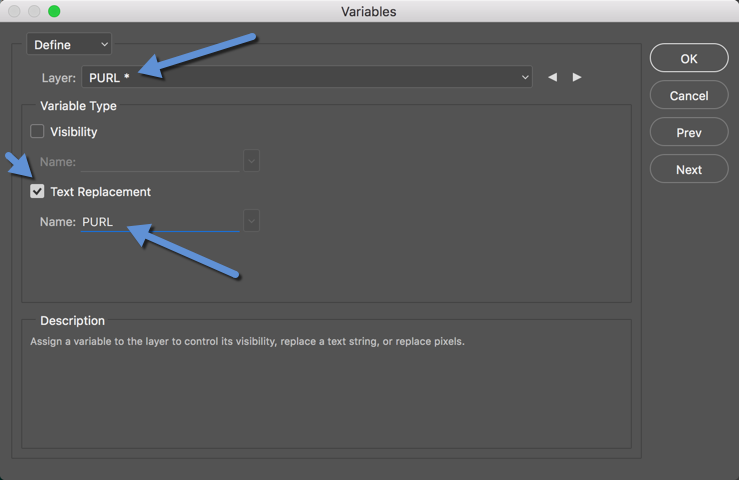
6. Define Each Layer
For each layer created in Step 4, Select either "Text Replacement" or "Pixel Replacement" checkbox, and give them a name.
Each layers's name needs to match the headers in the spreadsheet file from Step 3!
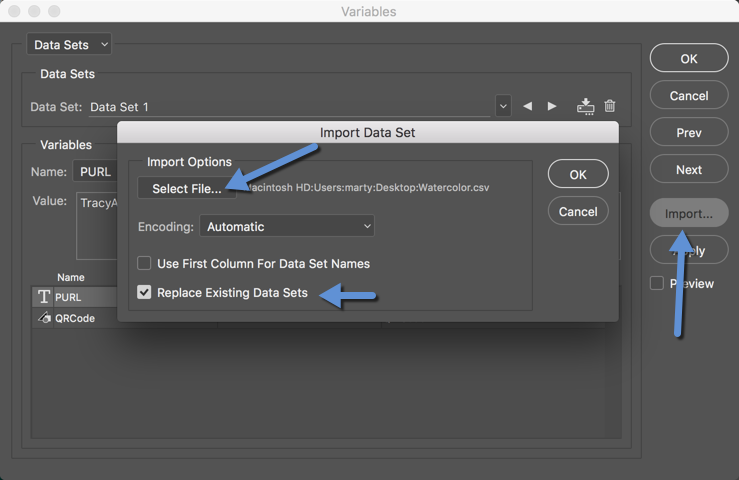
7. Import the Spreadsheet file as a Data Set
Select
Data Sets from the drop down on the top of the Variable Window.
Select
Import...
Select
File... and Browse the the PURL spreadsheet file saved from Step 3
Click
OK
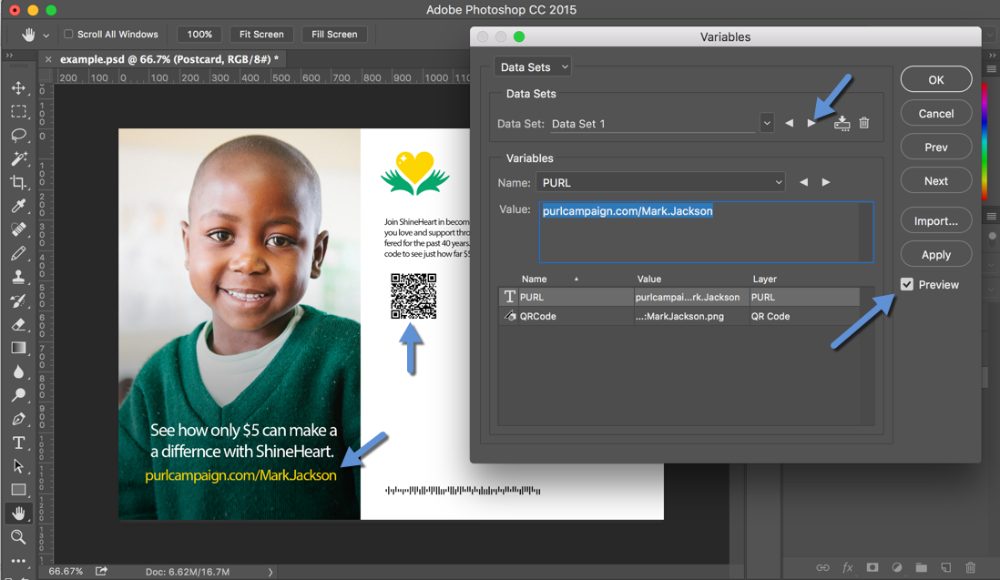
8. Preview Changes
Select the Apply button and your layers will magically pull from the data in your spreadsheet file.
Select the the arrows next to the Data Set text box to preview multiple versions.
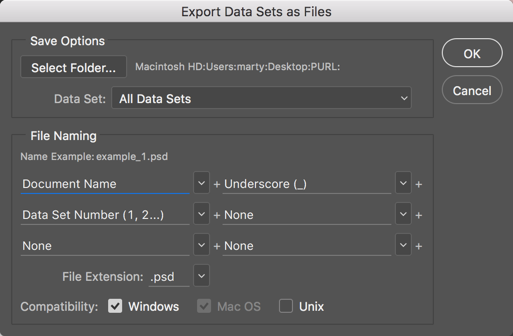
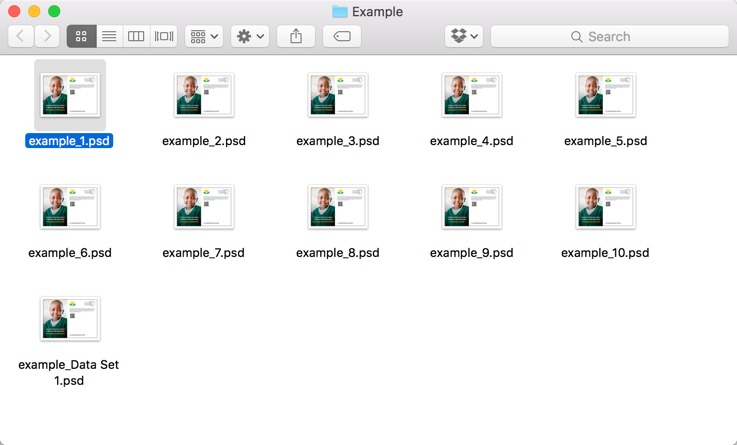
9. Export Data Sets as Files
Select
File > Export > Data Sets as Files...Select the Location to save the files to.
Leave the rest of the options the same (unless you know better).
Cool huh?...